

How To Change Audio Buffer Size In Windows 10

Dealing with latency, clicks, and pops are common frustrations when recording in any DAW. And so in this guide, we will talk over what audio latency is, why latency and also how to better latency when recording. Follow the sections below to go started.
- What is latency?
- How do yous fix latency?
- Cheque your system specs
- Optimize your computer
- Update your sound drivers
- Adjust buffer size and sample rate
- Utilize straight monitoring (if applicable)
- How to set the buffer size and sample rate in your DAW
Sound latency is the amount of time information technology takes for your audio or MIDI bespeak to exist sent into your interface or figurer, and so have the bespeak sent through analog to digital converters into your DAW, back into your interface, then have it be converted back into analog to your outputs. Merely put, it's when in that location's a delay between your audio or MIDI input and the output of your headphones or speakers. For case, if y'all're request yourself "Why does my microphone accept a delay?", that would be latency. Not only does this bear upon instruments like guitars and microphones, but latency also affects MIDI controllers, as well.
While each step in the process only takes milliseconds, there are a diverseness of factors that tin can increment the amount of time each step takes, thus increasing the amount of latency. The most common reasons why latency occurs are the audio driver(s) and hardware yous're using, and likewise the buffer size and sample rate.
Return to pinnacle
As mentioned in a higher place, there are a diversity of different factors that contribute to latency when you record. Assuming your calculator meets your DAW, virtual instrument, and effects plug-ins meet system requirements, allow'south go over some of the ways you can fix latency.
While this necessarily doesn't help you fix latency per se, it most certainly helps you determine what your system can handle, specifically the CPU and the RAM. If your system doesn't meet at least the minimum specs, the amount of latency tin be profoundly increased equally this directly ties in with your buffer size and sample rate. Learn more nigh how to find your estimator specs.
Most computers on the market today aren't fabricated with sound production in mind, and many DAWs and plug-ins require sure amounts of resource from your computer. These resource include difficult drive space, RAM, operating system, and processor. If the resource are being used elsewhere it can impact performance and issue in latency when recording. With that in mind, one elementary matter to do is to optimize your computer for recording.
Update audio and MIDI drivers
Out-of-date drivers tin as well contribute to recording latency, so check your audio or MIDI interface manufacturer's website to see if they released new audio drivers recently.
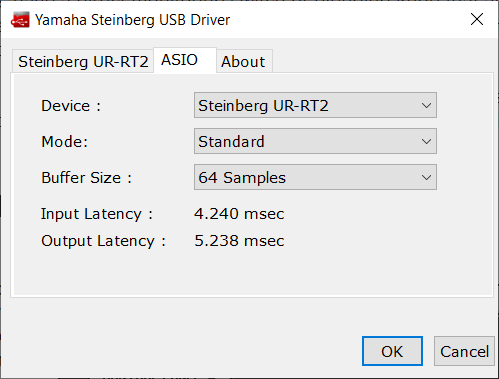
If you're using a USB microphone or sound interface that doesn't have a defended commuter, or connecting directly to your computer's audio input port on a Windows PC, exist sure you employ the 3rd-party ASIO4ALL driver. While audio software can use standard Microsoft audio drivers (MME, WDM, WASAPI) using an ASIO driver is preferred as it'south specifically made for professional sound software. Cheque out our article on the differences between sound drivers and also how to install and employ ASIO4ALL.
Adjust the buffer size and sample charge per unit
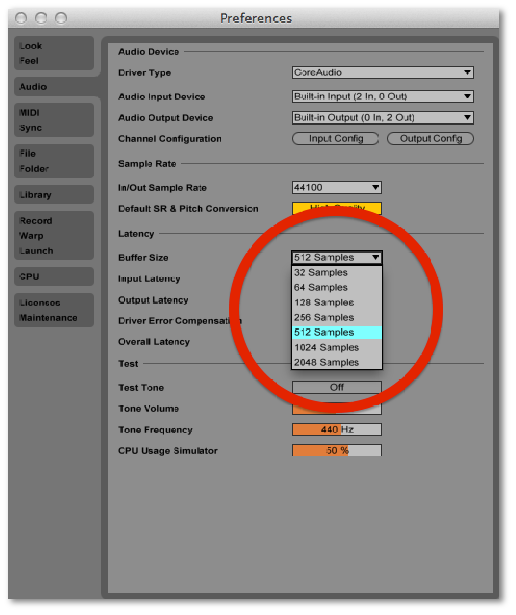
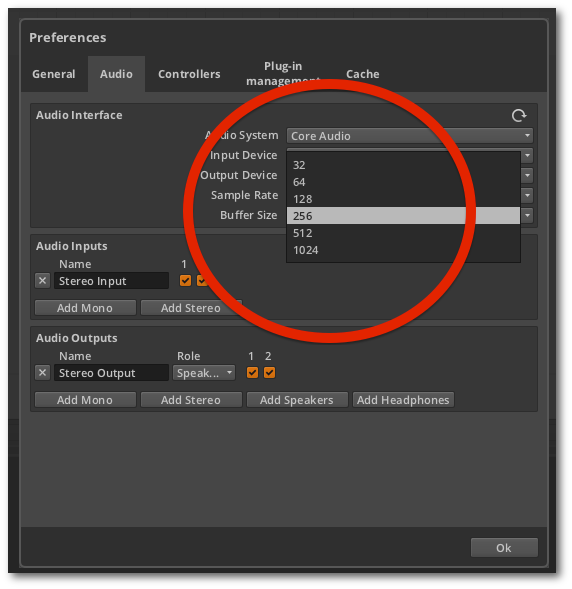
1 of the easiest ways to improve latency is to adjust the buffer size and sample charge per unit within your DAW. These two things direct affect how the latency is ready and how fast samples are being recorded. If you like math, here's an equation that will give y'all a general idea of latency in a typical ASIO configuration.
Just dissever the buffer size by the number of samples per 2nd (sample charge per unit). For example, if you have your buffer size set to 256 and your sample charge per unit at 48 kHz, carve up those two and you lot'll get v.three ms. If you modify the settings to 512 and 48 kHz, notwithstanding, it'll boilerplate out to 10.six ms.
Some audio interfaces have a straight monitoring switch or blending knob that allows you to hear what you're recording in real time with no latency. The style it works is that it sums the input signal and routes it directly to your principal outputs or headphone outputs.
- Directly monitoring does not process the post effects indicate, which ways merely the dry point will be monitored. For example, if you're recording vocals and have a reverb issue or motorcar-tune, you won't be able to hear those furnishings.
Render to top
How to gear up the buffer size and sample charge per unit in your DAW
Later you've optimized your computer and have the latest sound or MIDI drivers installed, the final matter you'll desire to do is to go into your DAW's audio settings and update the buffer size and sample rate. A good dominion to call back when it comes to buffer size is low for tracking, high for mixing.
You want a lower buffer size when tracking to ensure minimal delay. Only when you're mixing, you want to raise the buffer size so the computer tin can process a wider telescopic of tasks (such as processing a lot of plug-ins). For more data, read our article Which Buffer Size Setting Should I Use in my DAW?
- A lower buffer size will create less audible delay but will make your figurer work harder.
- A higher buffer size will create more audible delay but will gratis up resources for your reckoner to use on other processing tasks.
Some interface drivers may include a dedicated command console where you can adjust its sample rate and buffer size. Depending on the DAW and interface, they may sync, merely click on your DAW from the list below to learn how to adjust its buffer size:
Below are the steps to accommodate your buffer size in Ableton.
- Go to Setup, then select Playback Engine.
- Choose the buffer size from the drop-downward menu.
- Your session will restart.
- For more tips, cheque out Ableton'south article on reducing the CPU load.
- Go to Setup, then select Playback Engine.
- Choose the buffer size from the drop-down menu.
- Your session volition restart.
- For more than tips, bank check out Ableton'due south article on reducing the CPU load.
Follow the steps beneath to adapt buffer size in Bitwig.
- Choose Options, then click Preferences.
- Select the Audio tab.
- Choose the buffer size from the driblet-down menu labeled Buffer Size.
Below is a list of steps to assistance you accommodate buffer size in Cubase.
- Go to Devices and select Device Setup.
- Cull VST Audio Arrangement on the correct.
- Brand certain your interface is selected in the driblet-down bill of fare at the top.
- Select your interface under VST Audio System from the list on the right.
- Click Control Panel and choose your buffer size from the drib-down menu.
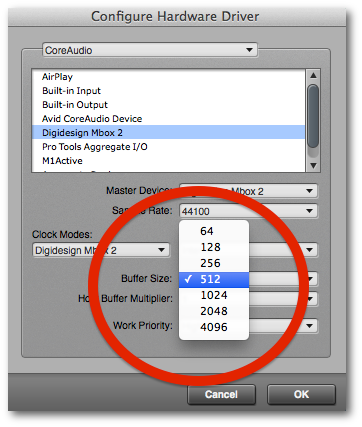
Follow the following steps to accommodate buffer size in Digital Performer.
- Choose Setup, select Configure Audio System, and click Configure Hardware Driver.
- Choose the buffer size from the drib-down menu.
To adapt buffer size in FL Studio, follow these steps:
- Go to Options, and then select Audio Settings.
- Cull the buffer size from the drop-down bill of fare.
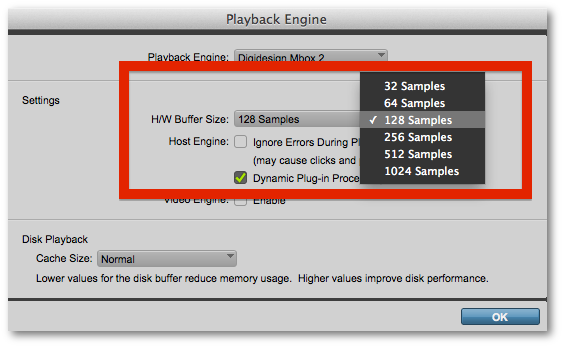
Adjust buffer size in Pro Tools by following the steps below.
- Go to the Setup tab and click Playback Engine.
- Choose the buffer size from the drop-downwards carte.
- Your session will restart.
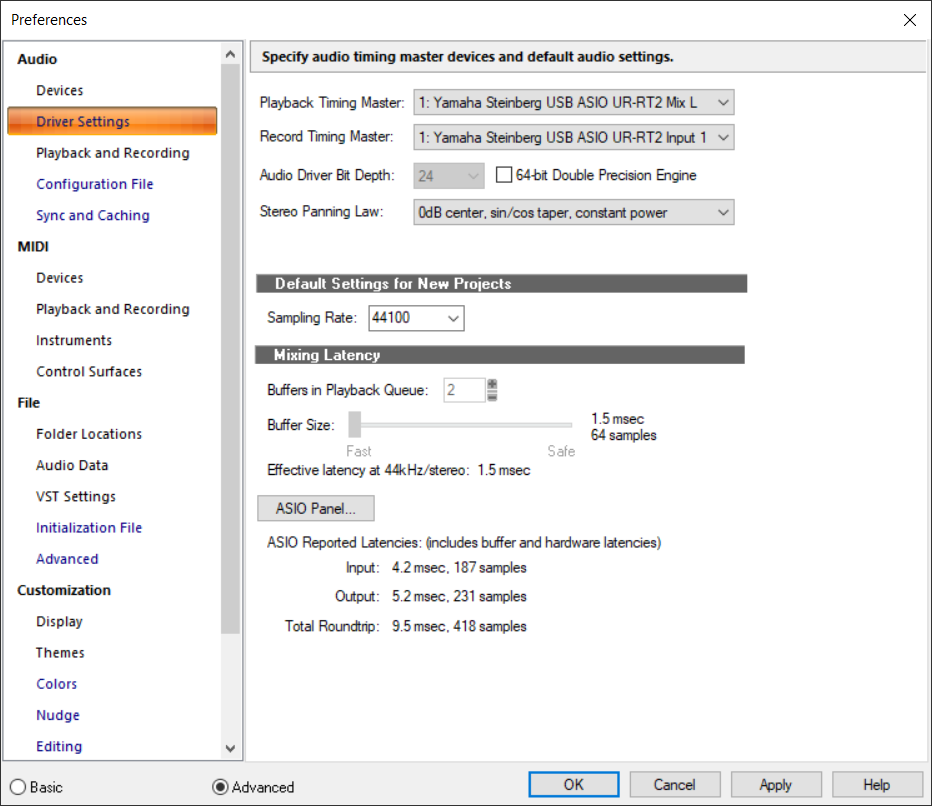
Follow these steps to adjust buffer size in Sonar:
- Cull Edit and click Preferences.
- On the left, choose the Playback and Recording tab. Make certain Driver Style is set to ASIO.
- Choose Driver Settings from the left. Your Playback Timing Master should be gear up to your interface or ASIO driver.
- Click the ASIO Console push button near the bottom and select the buffer size from the drop-down menu.
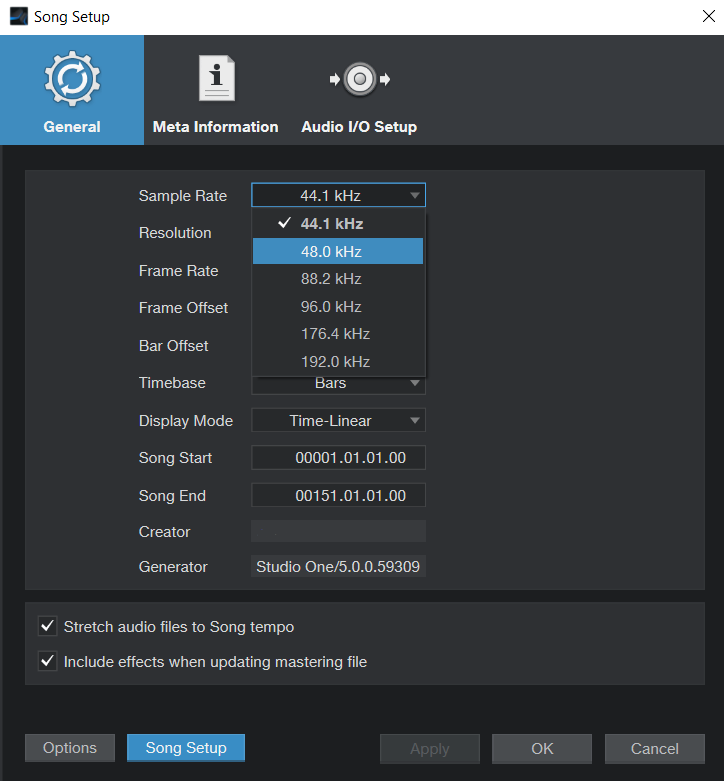
Accommodate buffer size in Studio One past following these steps:
- Choose Vocal, select Vocal Setup, and then click Preferences in the lower left-mitt corner of the window.
- In the Audio Setup tab, but choose your buffer size from the drop-downwardly window labeled Device Cake Size.
Related Articles
When you need help, Sweetwater has the answers!
Our knowledge base of operations contains over 28,000 expertly written tech articles that volition requite you lot answers and help y'all get the virtually out of your gear. Our pro musicians and gear experts update content daily to proceed you informed and on your way. All-time of all, information technology'due south totally Complimentary, and it's just another reason that yous go more at Sweetwater.com.


Source: https://www.sweetwater.com/sweetcare/articles/im-getting-latency-delay-when-recording-on-my-computer/
Posted by: cameronandso1947.blogspot.com
0 Response to "How To Change Audio Buffer Size In Windows 10"
Post a Comment